

With the Support tickets module on and the ticket pages in place, clients file tickets from the front end and agents answer them in WordPress admin.
Front end: filing a ticket
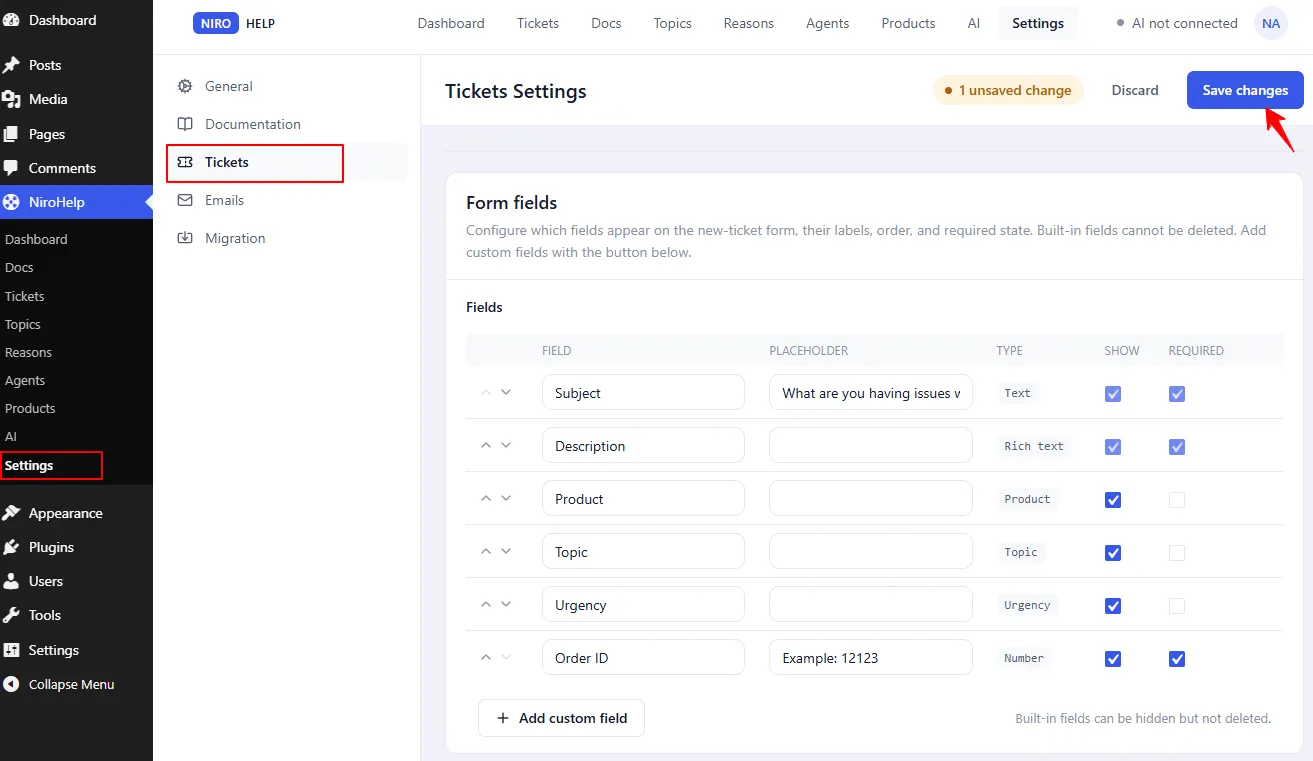
The Submit a Ticket page shows the form. Which fields appear is up to you – it is driven by Settings → Tickets → Form fields, where every row can be switched on or off, made required, relabelled and given hint text. The six built-in fields ship enabled:
| Field | Notes |
|---|---|
| Subject | Always on, always required. Becomes the ticket title. |
| Description | Always on, always required. Becomes the ticket body. |
| Product | Which product the ticket is about. |
| Topic | The reason for the ticket. The list is called Reasons; the field is labelled Topic by default. |
| Urgency | Low / Medium / High / Severe. |
| Order | A free-text reference such as an order number. |
You can add your own fields too. See Building the ticket form.
If the visitor is logged out, the page shows the login form first, using whichever login method you configured. After signing in they land back on the form.
Front end: the client’s ticket list
The My Tickets page shows a signed-in client their own tickets. Clicking a row opens the conversation, where they read agent replies and add their own.
There is also an optional all-tickets page for agents who prefer to work from the front end rather than wp-admin.
Admin: working the queue
NiroHelp → Tickets is a standard WordPress list. NiroHelp adds two columns, Client and Agent; everything else is WordPress’s own.
Know what is not there, because it is easy to assume otherwise:
- There are no status, product or reason filter dropdowns above the table. Use the search box or the taxonomy links instead.
- Quick Edit is WordPress’s own. It edits the title, slug, date, status and author – not the agent, urgency, product or reason.
- Columns do not sort by urgency.
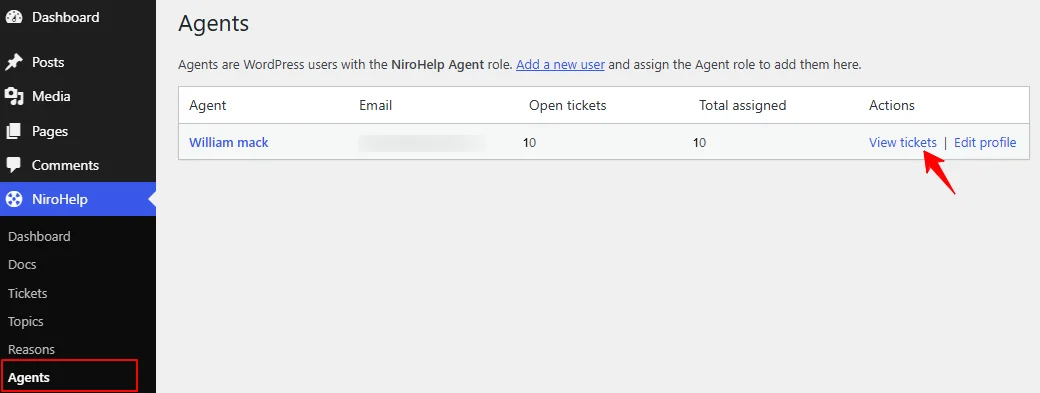
The one filter NiroHelp adds is per-agent, and you reach it through the View tickets link on NiroHelp → Agents.
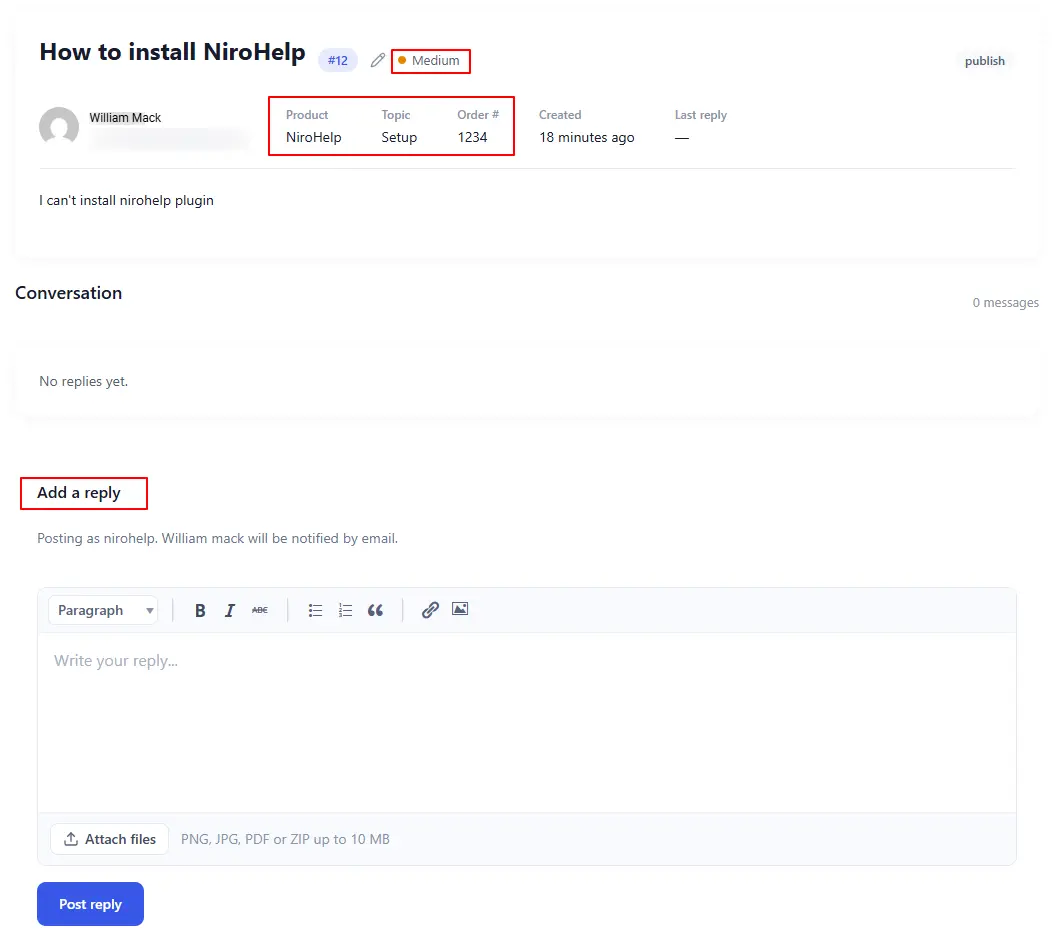
Opening a ticket gives you:
- The full conversation.
- A Ticket details box in the sidebar with the client’s name and email (read-only), Assigned agent, Urgency and Order ID.
- The Product and Reasons boxes.
- The status, in the ordinary Publish box.
- A reply box.
What happens when you reply
Posting an agent reply does two things by itself:
- The status flips to In Progress, unless the ticket is already Resolved, Closed or Cancelled. See Ticket statuses.
- The “Agent replied” email goes to the client, carrying a one-click link back into the conversation.
It also cancels any AI auto-responder reply that was queued for that ticket. A human reply always wins.
Both behaviours are adjustable: the status flip under Settings → Tickets → Behaviour, the email under Settings → Emails.
Was this doc helpful?